Creating your own eyelash adhesive at home has become increasingly popular among beauty enthusiasts seeking to avoid the harsh chemicals often found in commercial products. This natural approach not only offers a gentler alternative for those with sensitive eyes but also provides a cost-effective solution for regular false lash wearers. With just a handful of ingredients typically found in your kitchen or bathroom cabinet, you can craft a reliable adhesive that performs admirably whilst keeping your natural lashes protected and healthy. The process requires minimal equipment and can be mastered with a bit of practice, making it an accessible option for anyone looking to take control of their beauty routine.
Essential Ingredients and Equipment for Your DIY Eyelash Adhesive
Natural ingredients that work: what you'll need to gather
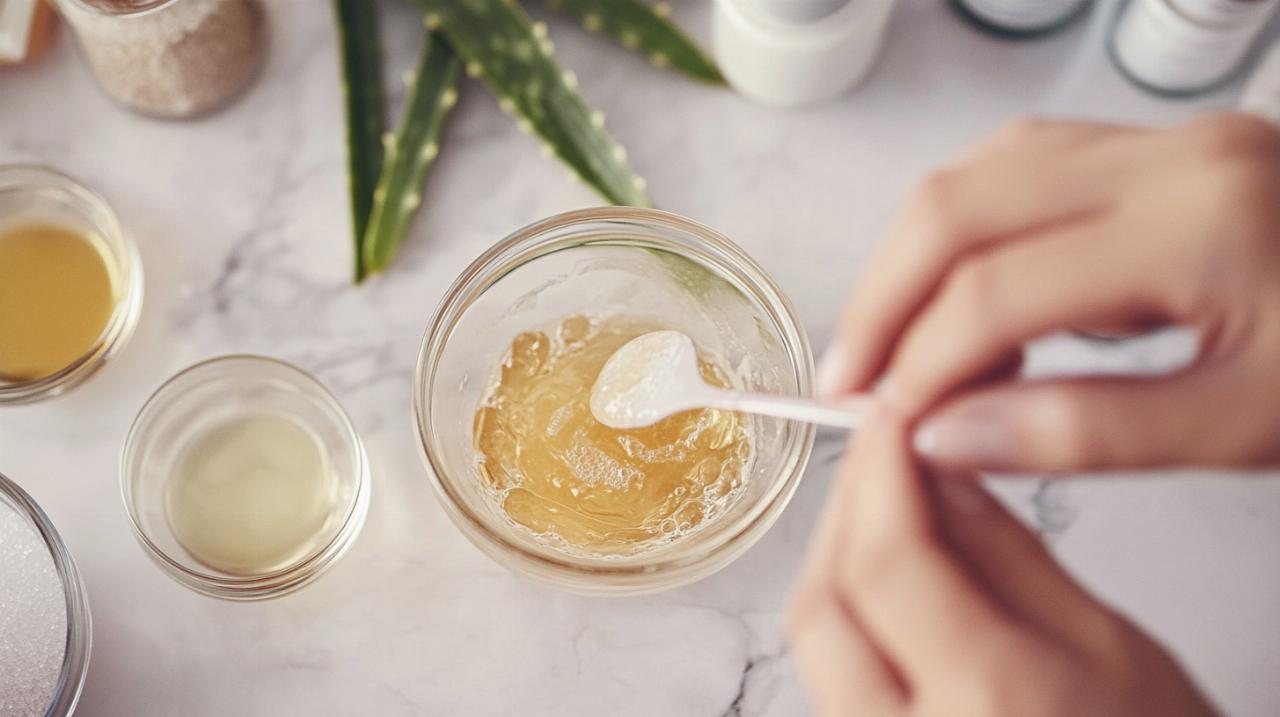
The beauty of crafting homemade eyelash glue lies in its simplicity and the accessibility of the required components. One of the most popular recipes combines honey and sugar with water to create a sticky yet safe adhesive suitable for holding false lashes in place. Honey serves as an excellent natural binding agent whilst possessing antimicrobial properties that help maintain hygiene around your delicate eye area. Sugar contributes to the adhesive quality of the mixture, providing the necessary tackiness to secure your lashes throughout the day. For those seeking alternatives, corn syrup can substitute for honey in the recipe, offering similar binding characteristics with a slightly different consistency.
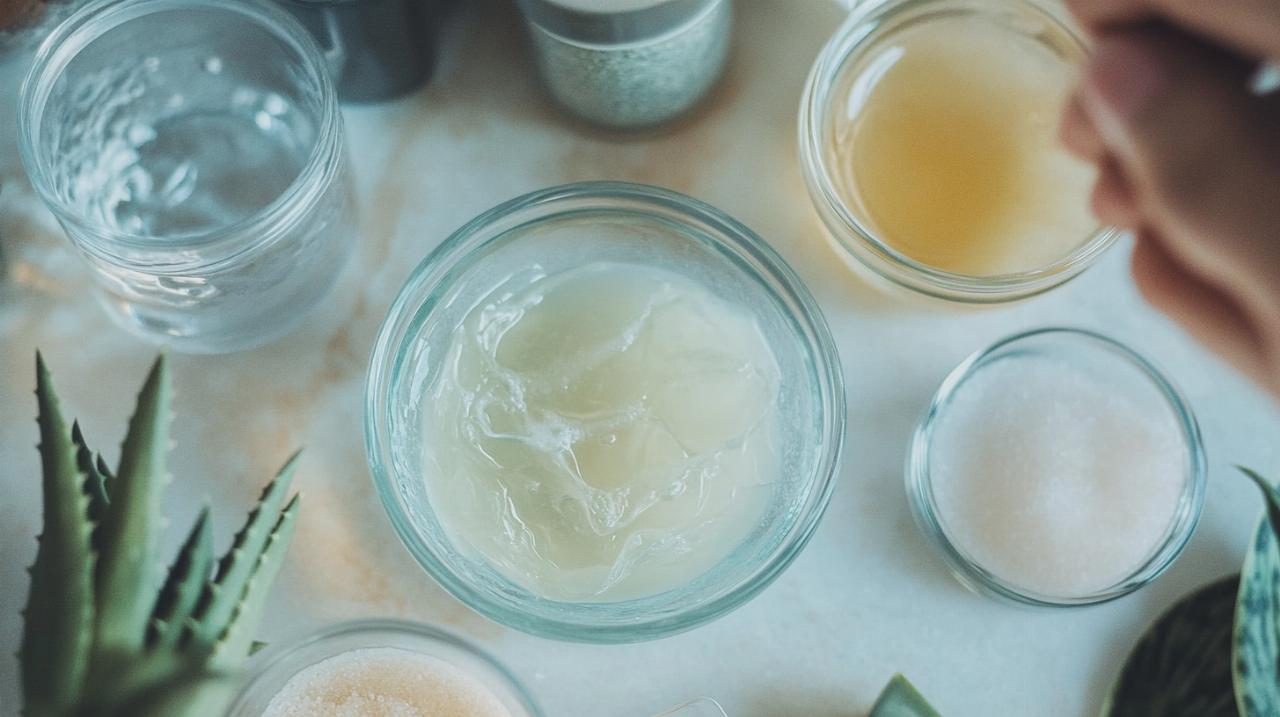
Another effective combination involves mixing petroleum jelly or Vaseline with vitamin E oil, which creates a gentle adhesive that nourishes the lash line whilst holding your falsies securely. This particular formula works especially well for individuals with drier skin around the eyes, as the vitamin E oil provides moisturising benefits alongside its adhesive properties. Aloe vera gel combined with coconut oil presents yet another natural option, offering soothing qualities that can reduce irritation whilst maintaining adequate hold. These ingredients are particularly beneficial for those prone to allergic reactions, as they contain fewer potential irritants compared to commercial formulas that often include formaldehyde and cyanoacrylates.
For those willing to experiment further, flour and water can be mixed to create a simple paste-like adhesive reminiscent of traditional paper glue but adapted for cosmetic use. Egg white, when properly prepared, serves as an entirely natural protein-based adhesive that dries clear and holds remarkably well. However, this option requires particularly careful hygiene practices due to the perishable nature of the ingredient. Regardless of which recipe you choose, ensuring that all components are fresh and free from contamination is paramount to preventing eye infections or adverse reactions.
Proper Equipment and Safety Considerations for Preparation
Preparing your DIY eyelash adhesive requires minimal specialised equipment, though maintaining sterility throughout the process cannot be overstated. A small, clean mixing bowl serves as your primary vessel for combining ingredients, whilst a small whisk or clean spoon allows for thorough blending. Many beauty enthusiasts find that using measuring spoons ensures consistency between batches, which proves particularly important when you discover a formula that works perfectly for your needs. A small funnel can facilitate transferring your finished adhesive into a storage container without waste or mess.
Safety considerations extend beyond the preparation phase into application and storage as well. Before using any homemade adhesive near your eyes, conducting a patch test proves essential to identify potential allergic reactions. Apply a small amount of your prepared glue to the inside of your wrist or behind your ear and wait a full twenty-four hours to observe any adverse reactions such as redness, itching, or swelling. This precautionary step can prevent uncomfortable or potentially dangerous reactions near your sensitive eye area. Additionally, working in a clean environment with freshly washed hands minimises the risk of introducing bacteria into your adhesive formula.
Storage equipment should include a small, airtight container that has been thoroughly sanitised before use. Glass containers often prove superior to plastic alternatives as they resist bacterial growth more effectively and allow you to visually inspect your adhesive for any changes in appearance that might indicate spoilage. Keep your homemade glue refrigerated between uses to extend its shelf life, though even with proper storage, most natural formulas remain viable for only two to three days before requiring a fresh batch. This limited shelf life represents one of the key differences between homemade and commercial adhesives, which contain preservatives to extend their usability.
Creating your natural lash adhesive: a comprehensive recipe and method
Mixing your diy eyelash glue: exact measurements and techniques
The honey and sugar recipe stands as one of the most reliable formulas for homemade eyelash adhesive. Begin by combining one teaspoon of honey with half a teaspoon of granulated sugar in your clean mixing bowl. Add approximately one tablespoon of water gradually, mixing constantly to achieve a consistency that resembles traditional eyelash glue. The mixture should possess a sticky quality without being overly runny, as this balance determines how effectively it will hold your lashes throughout wear. Heat can be gently applied to help dissolve the sugar completely, though avoid bringing the mixture to a boil as excessive heat can alter its adhesive properties.
For the Vaseline and vitamin E oil formula, start with one teaspoon of petroleum jelly and add three to four drops of vitamin E oil. Mix these components thoroughly until they blend into a smooth, uniform paste. The petroleum jelly provides the adhesive base whilst the vitamin E oil softens the consistency slightly and adds beneficial properties for the delicate skin around your eyes. This particular formula tends to produce a thicker adhesive that works exceptionally well for heavier false lashes or those with multiple layers. Should you find the consistency too thick for your preference, adding an additional drop or two of vitamin E oil can thin it to your desired texture.
The aloe vera and coconut oil combination requires equal parts of each ingredient, typically one teaspoon of pure aloe vera gel to one teaspoon of liquefied coconut oil. Blend these together vigorously until they form a cohesive mixture rather than separating into distinct layers. This formula produces a lighter adhesive that suits everyday wear and natural-looking lashes beautifully. For the flour and water paste, mix two tablespoons of plain flour with enough water to create a smooth, glue-like consistency, typically around three to four tablespoons. This mixture requires the most thorough blending to eliminate lumps that could interfere with smooth application.
Testing and Adjusting Consistency for Different Lash Types
Understanding that different lash styles require varying adhesive strengths proves crucial to achieving successful results with your homemade formulas. Lightweight, natural-looking lashes often perform best with thinner adhesives that provide sufficient hold without overwhelming the delicate lash band. Testing your prepared adhesive on the back of your hand allows you to assess its tackiness and drying time before application near your eyes. The adhesive should feel sticky to the touch without being excessively wet or slippery, and it should begin to dry within thirty seconds to one minute of application.
Heavier lashes with dramatic volume or significant embellishment require a stronger adhesive with greater holding power. If you find your initial batch lacks sufficient strength for your chosen lashes, adjusting the ratios of your ingredients can enhance performance. Adding slightly more honey or sugar to your water-based formula increases tackiness, whilst incorporating a touch more petroleum jelly into your Vaseline-based recipe boosts holding strength. Conversely, if your adhesive proves too strong or uncomfortable, diluting it with additional water or oil creates a gentler formula more suitable for sensitive eyes or lightweight lashes.
Temperature and humidity in your environment can significantly affect how your homemade adhesive performs. Warmer conditions may cause certain formulas to become overly liquid, whilst cold temperatures can thicken them beyond practical usability. Preparing your adhesive in small batches allows you to adjust for these variables without wasting ingredients or dealing with large quantities of unsuitable glue. Keep notes on which recipes and ratios work best for your specific lash types and environmental conditions, creating a personalised reference guide that streamlines future preparation.
Application Tips and Proper Storage Methods for Longevity
How to Apply Your Homemade Adhesive to False Lashes and Extensions
Applying your homemade eyelash adhesive requires a slightly different technique compared to commercial products, primarily due to variations in consistency and drying time. Using a clean brush or small wand, apply a thin, even layer of adhesive along the lash band, ensuring complete coverage from one end to the other without creating clumps or thick spots. Allow the adhesive to become tacky before positioning the lashes on your lid, typically waiting between thirty seconds and one minute depending on your specific formula. This waiting period proves essential as attempting to apply lashes with wet adhesive results in poor hold and messy application.
Positioning your false lashes requires precision and patience when working with homemade adhesive. Begin by placing the lash as close to your natural lash line as possible, starting from the inner corner and working outward toward the outer edge of your eye. Gentle pressure applied with clean fingertips or a lash applicator tool helps secure the bond between the adhesive and your skin. Should you notice any lifting at the corners, a cotton bud dipped in your adhesive can be used to apply a tiny additional amount directly to the problem area, pressing gently to seal the bond. This targeted approach prevents using excessive adhesive whilst addressing weak spots effectively.
Removing your false lashes at the end of the day requires care to avoid damaging your natural lashes or irritating your delicate eye area. Natural oils such as coconut oil, olive oil, or even makeup remover can be applied along the lash line to gently dissolve the adhesive bond. Allowing the oil to sit for a few moments before attempting removal loosens the adhesive sufficiently to permit gentle peeling of the lash band away from your lid. Warm water can also help dissolve most homemade formulas, particularly those based on honey or flour. Never pull or tug at false lashes, as this can remove your natural lashes along with the falsies and cause unnecessary damage to this sensitive area.
Storing your natural eyelash glue and shelf life expectations
Proper storage proves absolutely critical to maintaining the effectiveness and safety of your homemade eyelash adhesive. Immediately after preparation, transfer your adhesive into a clean, airtight container that has been thoroughly sanitised to prevent bacterial contamination. Glass containers with tight-fitting lids work particularly well as they provide an impermeable barrier against air and moisture whilst allowing you to visually inspect your adhesive for any signs of spoilage. Store your container in the refrigerator between uses, as the cool temperature significantly extends the usable life of natural ingredients that would otherwise spoil quickly at room temperature.
Despite optimal storage conditions, homemade eyelash adhesive maintains its effectiveness for only a limited period compared to commercial alternatives. Most natural formulas remain viable for two to three days when refrigerated, after which they should be discarded and replaced with a fresh batch. Signs that your adhesive has spoiled include changes in colour, separation of ingredients that cannot be remedied through mixing, unusual odours, or mould growth. Using adhesive past its prime risks eye infections and irritation, making it essential to err on the side of caution and prepare fresh batches regularly rather than attempting to extend the life of questionable formulas.
Creating small batches rather than large quantities aligns perfectly with the limited shelf life of natural adhesives whilst reducing waste and ensuring you always have fresh product available. Many users find that preparing enough adhesive for two to three applications strikes the ideal balance between convenience and safety. Labelling your storage container with the preparation date helps track freshness and prevents accidental use of expired adhesive. Should you find yourself frequently discarding unused portions, consider halving your recipe to produce even smaller quantities that align more closely with your actual usage patterns.